
The house is finally quiet.
The wind has passed, the rain has eased up, and now you're walking room to room with a flashlight and a knot in your stomach. A stain is spreading across the ceiling. Shingles are in the yard. One window took a hit. The fence is down, the gutters are twisted, and you already know the damage you can see isn't the whole story.
Around Houston, that moment is familiar. After a hurricane, a hard thunderstorm, or a hail event, most homeowners aren't just dealing with repairs. They're dealing with uncertainty. They don't know what the policy covers, what the adjuster will say, or whether the first insurance number they hear will be enough to put the house back together the right way.
The storm damage insurance claim process is where a lot of good homeowners get trapped. Not because they did anything wrong, but because they waited too long to document, said too much too early, or trusted that the insurer's first pass would catch everything. It usually doesn't.
The Storm Is Over Now The Real Work Begins
The first mistake many homeowners make is thinking the hard part was the storm.
It wasn't. The hard part is the next several days, when you're tired, busy, and vulnerable to bad decisions. That's when people start tossing wet drywall into a pile before taking photos, letting a roofer climb up without documenting what he found, or calling the insurer with a vague statement like "we've got some damage" that leaves too much room for interpretation later.
In Houston, the weather creates a special kind of mess. A roof leak may start at one slope, travel through decking, show up in a bedroom, and leave the adjuster arguing over whether the ceiling stain is storm-related or old. Wind may peel back shingles, then rain finishes the job. Trees, fences, flashing, soffits, gutters, and window seals all get involved. One event turns into five different scopes of repair.
That confusion is why the claims side matters as much as the construction side.
A homeowner usually needs two things right away. First, a clear head. Second, a process. If you don't have a process, the insurance company will supply one for you, and it won't be built around your interests.
I've seen the best outcomes happen when the homeowner slows down just enough to document before cleaning, asks better questions before agreeing to anything, and treats the property like a jobsite from the first day. Every photo, receipt, and conversation becomes part of the file.
If the damage is serious and you need immediate stabilization, it's worth understanding what professional home restoration services when you need it include. The right help protects both the house and the claim.
The claim starts long before the adjuster arrives. It starts the minute you decide what to photograph, what to save, and what to say.
Your First 48 Hours A Critical Action Plan
The first two days shape the rest of the claim.
You don't need to do everything at once. You do need to do the right things in the right order.
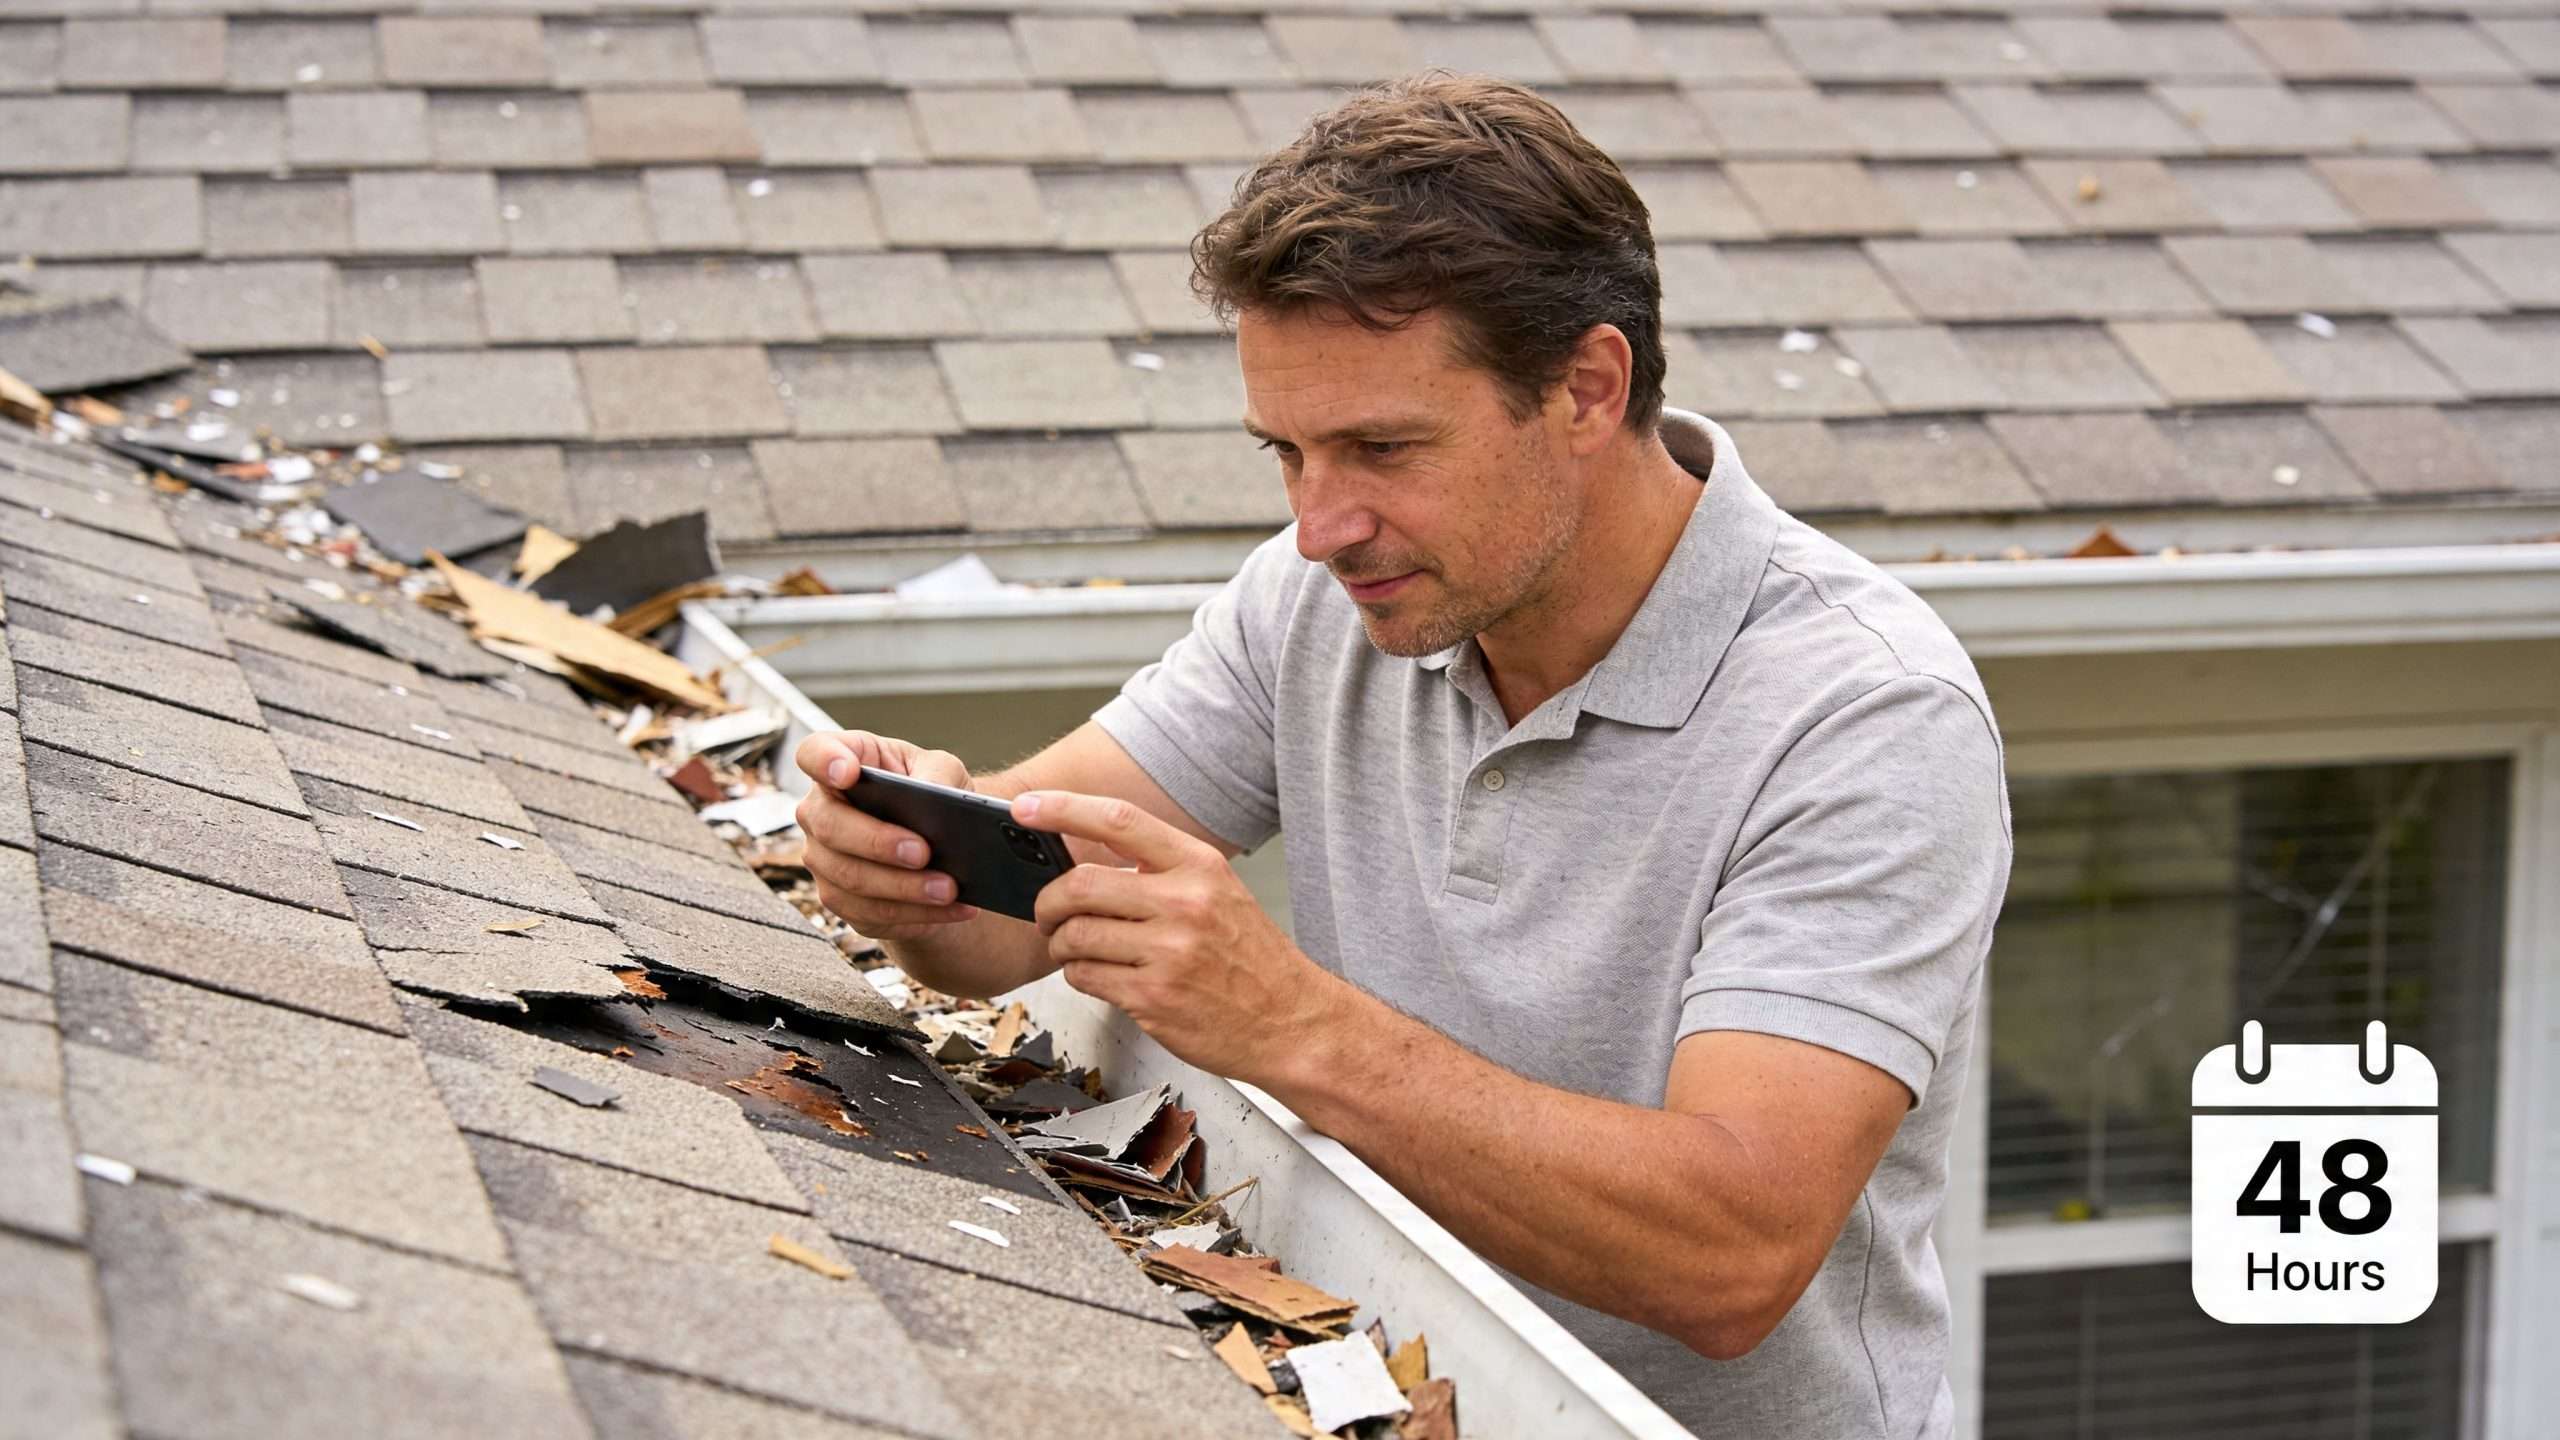
Start with safety and stop further damage
If power lines are down, the ceiling is sagging, or water is near electrical fixtures, don't turn this into a photo mission. Make the property safe first.
Then move into mitigation. In insurance terms, mitigation means taking reasonable steps to prevent additional damage after the storm. That can include tarping an exposed roof area, boarding a broken window, putting buckets under active leaks, moving furniture out of standing water, or removing wet materials that are creating an immediate hazard.
What doesn't work is doing a full tear-out before you've documented the condition.
Use this order:
- Protect people first: Keep family members out of unsafe rooms, especially where ceilings are wet or glass is broken.
- Photograph before moving items: Get wide shots, then closer shots, before cleanup starts.
- Perform temporary repairs only: Tarp, board, cover, and stabilize. Don't authorize major reconstruction yet.
- Save every receipt: Materials, emergency labor, hotel stays if applicable, and protective supplies all belong in your file.
Build your first claim file immediately
One of the most useful benchmarks homeowners should know is this: within 48 hours of filing a storm damage claim, an insurance adjuster should be assigned and actively working on your property assessment, according to FS Residential's storm insurance practices guidance.
That same guidance makes another point I strongly agree with. Submit high-resolution photography, interior and attic evidence, contractor estimates, and written inspection reports from day one. If you don't, the insurer has more room to say the damage wasn't fully documented or may have come from maintenance issues instead of the storm.
What to collect before the first inspection
Don't rely on your phone gallery alone. Create one folder for the claim and keep adding to it.
Include:
- Exterior photos: Roof slopes visible from the ground, missing shingles, lifted ridge caps, dented vents, damaged gutters, downspouts, siding, screens, fences, garage doors, and broken glass.
- Interior evidence: Ceiling stains, bubbling paint, warped trim, wet insulation, damaged flooring, swollen cabinets, and any attic signs of water entry.
- Basic notes: Date of storm, when you first noticed each issue, and what emergency steps you took.
- Contractor observations: If a roofer or remodeler inspected the home, ask for written notes, not just a verbal opinion.
- Expense log: Start a simple running list of what you've spent and why.
Practical rule: If you touch it, photograph it. If you pay for it, save the receipt. If someone inspects it, get it in writing.
Be careful on the first phone call
When you report the claim, stick to confirmed facts.
Good examples:
- The date the storm hit
- The areas you observed as damaged
- Whether the property needs emergency protection
- Whether the home is currently habitable
Avoid guessing about cause if you don't know yet. Avoid minimizing the damage too. Casual phrasing like "it's probably minor" has a way of sticking around in the claim file long after a contractor opens up the assembly and finds more damage underneath.
Create an Undeniable Record of Your Losses
Documentation wins claims.
Not charm. Not frustration. Not long phone calls. A clean, organized record of the damage does more for your position than almost anything else in the storm damage insurance claim process.
For Houston homeowners, this matters even more because wind and hail are so common. Wind and hail damage is the most frequent cause of homeowners insurance claims, affecting 1 in 36 homes annually and accounting for over 40% of all claims. Texas also led the nation with 637,977 hail claims from 2017 to 2019, and average payouts for these claims ranged from $11,695 to $12,913, according to this homeowners insurance claim statistics roundup. That volume is exactly why carriers scrutinize roof, siding, and window claims so closely.
Think like an adjuster before the adjuster thinks for you
An adjuster is looking for scope, cause, and support.
You should build your file around those same three ideas.
- Scope means every damaged area, not just the obvious one.
- Cause means what the storm did, and how the damage connects to that event.
- Support means photos, video, notes, receipts, maintenance records, and inspection reports.
A weak file says, "The roof leaked."
A strong file says, "After the storm on this date, the homeowner observed shingle loss on the rear slope, bent metal at the ridge vent, water staining in the upstairs bedroom, and wet insulation in the attic directly below the affected area."
How to photograph damage the right way
Individuals either take too few photos or too many useless ones.
You need both context and detail. Start with wide shots that show the whole elevation, room, or roof section as clearly as possible. Then move to close-ups that show the actual damage point. If your phone timestamps images automatically, keep that setting on. Video helps too, especially if you narrate what you're seeing as you walk.
Good photo habits include:
- Wide shots first: Show the entire room, wall, ceiling plane, roof edge, or exterior side.
- Close-ups second: Capture lifted shingles, torn flashing, broken seals, dents, cracks, and water staining.
- Repeat after mitigation: Photograph the property again after tarping or boarding so it's clear what changed.
- Use the attic: Many storm claims are won or lost by what shows up under the roof deck, around vents, and in insulation.
Don't skip pre-storm evidence
Insurers often push back by suggesting the issue was old, neglected, or unrelated to the weather event. That's where pre-storm evidence helps.
Look for:
- Prior home inspection reports
- Roof invoices
- Window replacement records
- Maintenance receipts
- Listing photos if you bought recently
- Everyday phone photos that incidentally show parts of the house before the storm
You aren't trying to create a perfect archive. You're showing the condition before the event was materially different from the condition after it.
Build a room-by-room loss inventory
Homeowners often get tired and start being vague at this point. Don't.
Walk the house one room at a time and list every damaged finish, fixture, and personal item that matters to the claim. Include brand names and approximate purchase dates when you know them. If you don't know the exact date, say it's approximate instead of guessing.
| Item Category | Documentation Method | Key Details to Capture |
|---|---|---|
| Roof and exterior | Wide photos, close-ups, contractor notes | Missing shingles, lifted areas, dented vents, flashing damage, gutter separation |
| Windows and doors | Photos, video, written notes | Broken glass, failed seals, frame damage, water entry points |
| Attic and insulation | Flashlight photos, video walkthrough | Wet insulation, staining under decking, daylight through penetrations |
| Ceilings and walls | Wide room shots, close-ups | Stains, bubbling paint, drywall cracks, active drips |
| Flooring | Photos from standing and low angles | Buckling, cupping, staining, soft spots, edge swelling |
| Cabinets and trim | Close-ups, moisture-related notes | Swelling, delamination, warping, finish damage |
| Furniture and contents | Inventory list, receipts, photos | Brand, approximate purchase date, visible storm damage |
| Temporary repairs and living costs | Receipts, invoice copies, claim log | Tarping, board-up, cleanup supplies, emergency lodging if covered |
Make your file easy to follow
A chaotic file weakens good evidence.
Use simple folders such as:
- Exterior
- Interior
- Attic
- Temporary repairs
- Receipts
- Policy and claim communications
- Contractor reports
A homeowner doesn't need to think like a lawyer. But they do need to think like someone who may have to prove every damaged item twice.
When your documentation is this clean, the adjuster has less room to miss line items, and less room to blame condition issues on age or neglect.
Filing Your Claim and Managing the Adjuster Visit
Once your evidence is organized, file the claim. Don't wait for every estimate to come in if the damage is clear and active. Prompt notice matters.
The way you handle this phase determines whether the adjuster sees a fully prepared property owner or a confused homeowner reacting in real time.
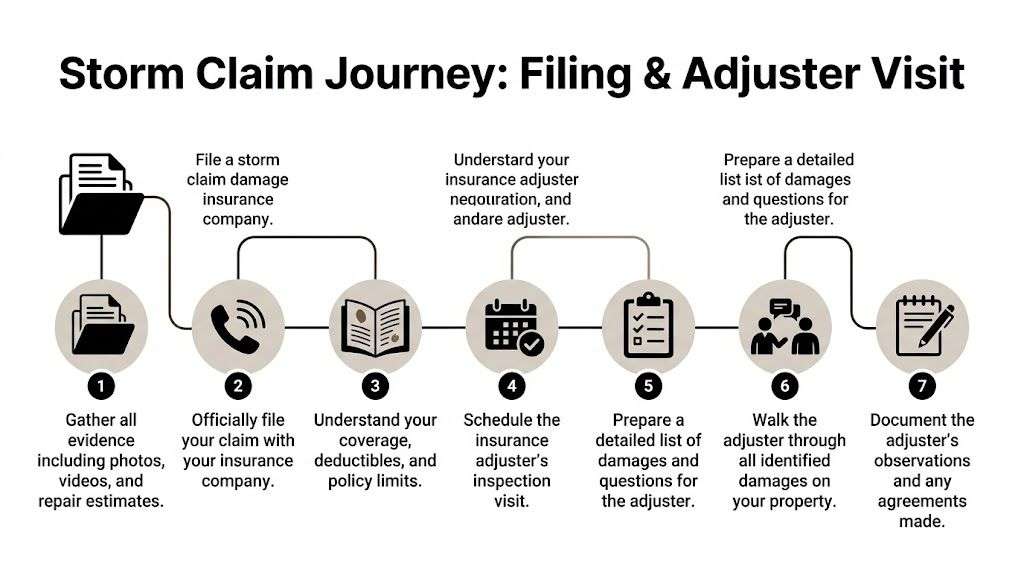
What to say when you open the claim
Keep the first report short and factual.
You need to communicate:
- Your policy information
- The storm date
- The general categories of damage observed
- Whether emergency mitigation has been performed
- Whether the home is currently safe to occupy
You do not need to give a dramatic walkthrough over the phone. You also don't need to speculate on every damaged component before an inspection. The first notice should open the file, not lock you into an incomplete version of events.
Useful language sounds like this:
"We experienced storm-related damage on the property after the recent event. We've observed damage to exterior components and interior water intrusion, and we've taken temporary measures to prevent further loss. We'd like to open a claim and schedule the inspection."
That is clean. It is accurate. It doesn't overshare.
Understand who the adjuster works for
A lot of homeowners accidentally treat the adjuster like a neutral project manager. That's not the role.
The adjuster is there to inspect, document, and prepare the insurer's position. Some are thorough. Some are rushed. Some are excellent on roofs and weak on interiors. Some notice what's easy to see and miss hidden assemblies entirely.
That matters more now because the environment is tougher. Catastrophic storm claims made up 46% of all personal lines property claims in 2023, with hail claims at 71% catastrophic and wind claims at 62% catastrophic, according to the LexisNexis discussion of catastrophic property claims hitting a record forty-six percent. In practical terms, that means more scrutiny, more caution, and often less generosity on the first inspection.
Prepare the house like a formal inspection
Don't let the adjuster wander through a messy scene while you try to remember what happened.
Before the visit:
- Create a printed damage list: Group it by exterior, attic, and interior.
- Have photos ready: Especially early photos taken before temporary repairs.
- Set out receipts and invoices: Tarping, board-up, emergency work, and inspection reports.
- Mark problem areas: Use painter's tape or notes if an issue is easy to miss.
- Open access points: Attic hatches, gate latches, utility areas, detached structures.
If you have a contractor you trust, have that person present. Not to fight. To make sure the scope is complete.
How to walk the property with the adjuster
This is not the time to hang back and hope they catch everything.
Walk with them. Point out each area in a calm, direct way. Start outside, then move into the attic, then the interior. If the leak shows in a bedroom, connect it to what was observed above that room. If fencing, windows, gutters, soffits, or detached structures were hit, mention each one specifically.
Don't flood the conversation with opinions. Stay on observed conditions.
Good phrasing:
- "This stain appeared after the storm."
- "This area was dry before the event."
- "These photos show the condition before temporary covering."
- "This contractor identified damage in this section during the post-storm inspection."
Take your own notes during the inspection
Most homeowners forget half the conversation after the adjuster leaves.
Write down:
- The adjuster's name and contact information
- Date and time of inspection
- Areas they did inspect
- Areas they declined or couldn't access
- Items they said they'd include
- Items they questioned
- Any next steps they mentioned
Don't rely on memory. After a long inspection, homeowners often remember the adjuster's tone and forget the details that matter more.
If the adjuster misses something, send a follow-up email the same day or the next morning. Keep it simple, professional, and specific. The goal is to create a written record that the overlooked item was identified promptly.
Decoding the Settlement The Fight for Fair Payment
The first settlement number is not the finish line.
In many storm claims, it's the beginning of true negotiation. Homeowners often feel relief when the estimate arrives, then confusion when they compare that number to what repairs cost. That gap usually comes from one of three places. The insurer scoped the damage too narrowly, priced the work too low, or paid on a different valuation basis than the homeowner expected.

Know the difference between ACV and RCV
The two terms that matter most are Actual Cash Value (ACV) and Replacement Cost Value (RCV).
ACV is the depreciated value of the damaged item. In plain English, the insurer subtracts for age, wear, or condition before paying.
RCV is the cost to replace the damaged item based on the policy terms. Depending on the policy and process, the insurer may issue an initial payment and then release additional funds after repairs are performed and documented.
Homeowners get blindsided. They assume the first check reflects the full amount needed to rebuild, when it may only reflect the depreciated amount or an incomplete scope.
A simple deductible example helps. If your policy has a $1,000 deductible and the covered damage totals $8,000, the insurer pays $7,000 and you pay the remaining $1,000, as explained in this overview of deductible mechanics in storm damage claims. If the damage is below the deductible, insurance pays nothing.
For Gulf Coast homeowners, the larger issue is that windstorm or hurricane deductibles may be based on a percentage of the home's insured value rather than a flat amount. That changes the math quickly.
Why the first estimate often comes in low
The estimate may look detailed and still be incomplete.
Common problems include:
- Missed line items: Flashing, underlayment, trim, insulation, paint, detach and reset work, code-related items, and disposal.
- Partial interior scope: The estimate includes the ceiling patch but misses wall blending, flooring transitions, or cabinet damage.
- Unrealistic sequencing: The insurer prices isolated repairs that don't reflect how the work must be performed.
- Depreciation shock: The homeowner expected replacement cost and received ACV on the first pass.
Another practical issue is time. Nearly 60% of policyholders misunderstand their policy specifics, many face 60-day average waits for adjuster reports, and 40% of claims are initially underpaid due to insurers prioritizing ACV. That same source says an independent contractor's estimate can boost settlements by 25% to 40%, according to Kennon Law's discussion of documenting storm or tornado damage.
That tracks with what contractors see on the ground. A detailed scope from someone who builds and repairs homes often catches what a desk estimate misses.
How to review the insurer's estimate
Read it line by line. Don't just look at the total.
Focus on:
- Scope. Did they include every damaged area?
- Quantities. Are room sizes, roofing measurements, and material counts reasonable?
- Trade coverage. Did they include roofing, drywall, paint, insulation, carpentry, glazing, flooring, and cleanup where needed?
- Pricing logic. Does the estimate reflect the work sequence required to do the repair correctly?
- Deductible and depreciation. Do you understand what's being withheld and why?
If the estimate includes unfamiliar abbreviations, ask for clarification in writing. A homeowner doesn't need to accept a document they don't understand.
When to file a supplemental claim
A supplemental claim is the normal path when the original estimate is missing damage or underpricing the work. This isn't aggressive. It's part of the process.
You file a supplement when:
- Hidden damage is discovered during teardown
- The original adjuster missed part of the scope
- The contractor's detailed estimate supports a higher amount
- Code or access requirements increase the actual repair cost
Send supporting documents, not emotion. The strongest supplement package usually includes updated photos, a revised contractor estimate, product information where relevant, and a concise explanation of what was omitted.
If you challenge a low offer, challenge the scope and the pricing. Anger doesn't change a claim file. Evidence does.
When outside help makes sense
Most straightforward claims can be resolved with good documentation and a solid contractor estimate.
If the carrier keeps denying obvious storm-related items, delays decisions without clear explanation, or refuses to address major scope differences, some homeowners bring in a public adjuster or legal counsel. That's a business decision. The right time is usually when the claim has moved from disagreement into a pattern of underpayment or misclassification.
The key is not to assume the insurer's first number is the final truth. It's one version of the loss. You need to compare it against what it takes to restore the home properly.
Houston-Specific Traps and How to Avoid Them
Generic storm claim advice misses what Gulf Coast homeowners run into all the time.
Around Houston, the policy language and the damage pattern often collide in ways that create avoidable disputes. Two of the biggest are deductible shock and causation fights.
The deductible surprise that changes the whole job
Many homeowners know they have a deductible. Fewer know that their windstorm or hurricane deductible may be different from their standard homeowners deductible.
That matters because a claim that looks substantial at first glance may not make financial sense once the applicable deductible is factored in. Before anyone starts talking about full restoration plans, compare the estimated covered damage to the deductible that applies to this type of storm loss.
Ask these questions early:
- Is this a standard deductible or a storm-specific deductible?
- Is it flat or percentage-based?
- Does this policy handle replacement cost and recoverable depreciation in stages?
- Are detached structures and interior damage treated the same way under this loss?
If you don't know those answers, you're making decisions in the dark.
The wind versus water fight
This is the dispute that catches many Gulf Coast homeowners off guard.
The insurer may accept that the home was damaged during the storm but argue that the key damage was caused by flood or rising water rather than covered wind. That distinction matters because standard policies often cover wind but not flood.
The most important issue is sequence. Did wind create the opening first? Did the roof or envelope fail before water entered? Was a window or door assembly compromised by storm forces before interior damage developed?
This is why the wind vs. water issue is so important. Public adjusters report 30% to 50% higher payouts on Texas Gulf Coast claims when forensic engineers are hired to prove wind caused the initial breach, and only 20% of homeowners know to take that step, according to this discussion of storm damage claim disputes and engineer support.
If the facts support wind causation, early engineering evidence can change the claim.
What helps and what hurts in Houston claims
The following habits usually help:
- Early attic inspection: Water often tells its story from underneath the roof deck before the ceiling makes it obvious.
- Storm-date evidence: Save weather alerts, photos from that day, and notes about when you discovered each issue.
- Maintenance records: Old roof invoices and repair receipts can defeat the lazy argument that the home was not maintained.
- Local contractor input: Contractors familiar with Houston, TX homes understand common failure points in Gulf Coast weather, from roof penetrations to window trim and moisture pathways.
What tends to hurt:
- Letting cleanup erase the evidence
- Accepting a cause-of-loss explanation without asking for support
- Hiring the first storm-chaser who knocks on the door
- Starting permanent repairs before the scope is documented
Watch the contractor traffic after a storm
After a major event, trucks show up fast.
Some are legitimate. Some are not. A homeowner under pressure can get pushed into signing broad agreements before understanding the insurance side, the payment structure, or the actual repair scope.
Use common sense:
- Verify licensing and insurance
- Ask for written scopes, not verbal promises
- Be careful with assignments or broad authorizations
- Make sure the repair plan matches the approved scope or the supplement strategy
A bad contractor can make a hard claim worse. A good one helps document, clarify, and rebuild without creating new problems.
Rebuilding Your Home and Your Peace of Mind
Storm recovery goes better when you treat the claim like a project, not a mystery.
Document early. Mitigate correctly. Read the estimate carefully. Question missing scope. Get outside support when the numbers don't reflect real repair work. Those steps don't eliminate stress, but they do strengthen your position.
The storm damage insurance claim process is frustrating when the homeowner stays reactive. It becomes manageable when the homeowner builds a file, keeps records, and works with people who understand both construction and claims.
Once the paperwork starts to settle, the focus shifts to rebuilding well. That means durable repairs, proper sequencing, and a contractor who can handle restoration work without losing sight of how the home needs to function afterward. If you're moving from claim phase into repair phase, understanding your options for storm and flood damage restoration is the next practical step.
Frequently Asked Questions About Storm Claims
Should I wait for the adjuster before making temporary repairs
No. If the house needs immediate protection, mitigate first and document everything before and after. Tarping, board-up work, and other emergency measures help prevent additional damage and usually strengthen your position when they're well documented.
What if the adjuster misses damage I can clearly see
Send a written follow-up promptly. Include photos, the location of the missed item, and any contractor notes that support it. Keep the tone professional. You're creating a record, not starting an argument.
Is the first insurance payment the final payment
Not always. It may reflect only part of the scope, a depreciated ACV payment, or an estimate prepared before hidden damage was found. Review the paperwork carefully and compare it to the actual repair requirements.
Should I get my own contractor estimate before agreeing to the settlement
Yes. An independent estimate gives you a real construction benchmark. It helps you spot missing line items, unrealistic pricing, and scope gaps before you commit to an underfunded repair.
When does a forensic engineer make sense
Usually when the insurer is disputing causation, especially in a wind versus water situation. If the sequence of damage matters to coverage, engineering support can be critical.
What should I keep after the claim is approved
Keep everything. Save the insurer's estimate, all emails, receipts, invoices, photos, change orders, proof of repairs, and any supplemental claim documents. If questions come up later, a complete file protects you.
If your home needs experienced guidance after a storm, H-Towne & Around Remodelers, Inc. can help you move from damage assessment to quality restoration. As a licensed and insured Houston-area remodeling company, the team handles storm and flood recovery work with the same attention they bring to kitchens, bathrooms, and whole-home renovations. If you need clear communication, detailed repair planning, and a contractor who understands what insurance-backed restoration requires, they're worth calling for a complimentary estimate.