
Bathroom Tile Installation: 5 Flawless Stages
Why Bathroom Tile Installation is the Foundation of a Beautiful, Functional Space
Bathroom tile installation is one of the most impactful upgrades you can make to your home. Whether you’re replacing dated tiles, creating a luxurious floor-to-ceiling design, or changing your entire bathroom, proper tile installation protects against moisture damage while dramatically improving your space’s appearance and value.
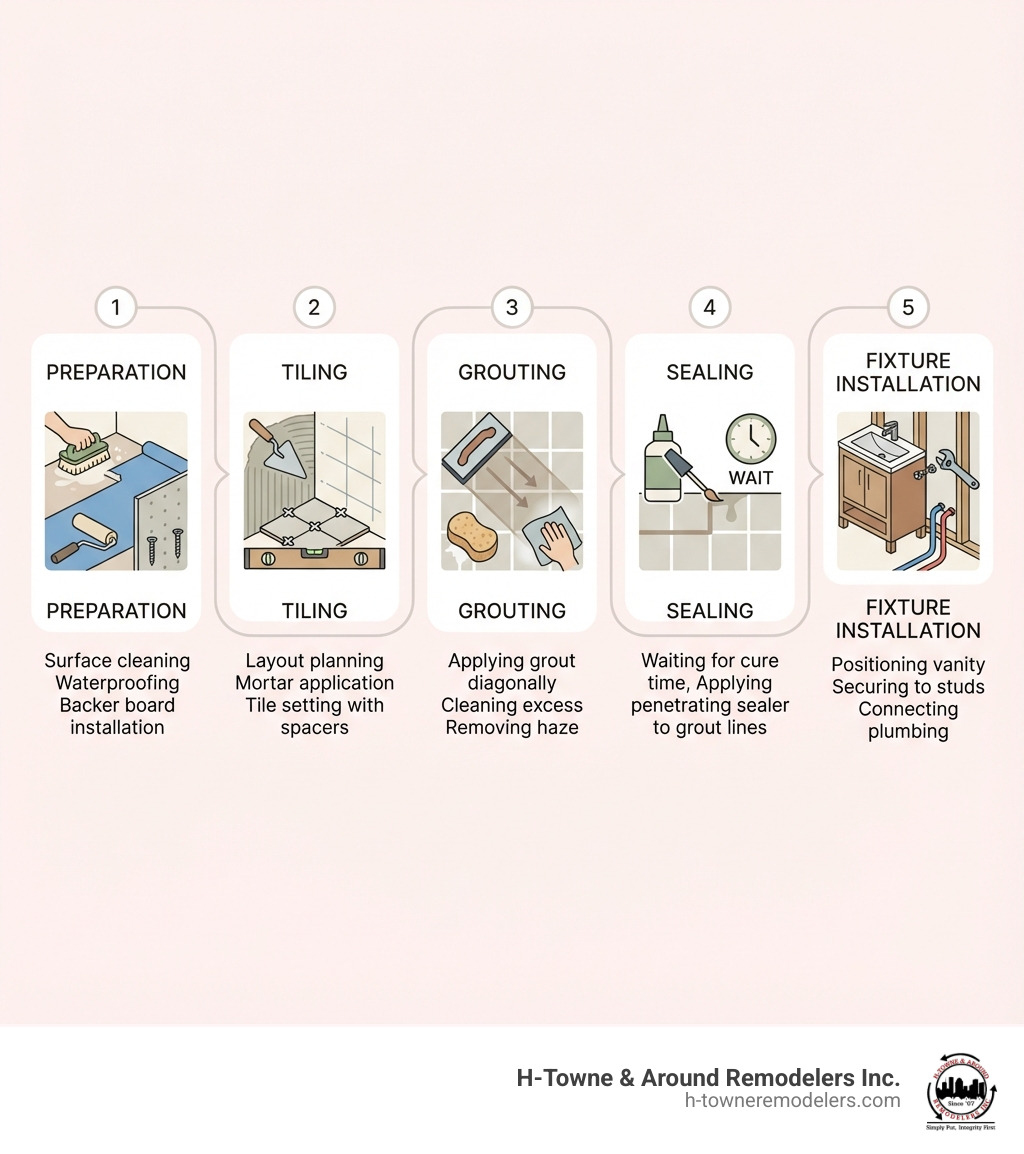
Quick Guide: Key Steps for Bathroom Tile Installation
- Prepare the Surface – Clean, level, and waterproof all areas before starting
- Plan Your Layout – Measure carefully, mark center lines, and dry-fit tiles
- Mix and Apply Thinset – Achieve proper consistency and apply at a 45-degree angle
- Set Tiles with Precision – Use spacers, press firmly, and check for level
- Grout and Seal – Force grout into joints, clean thoroughly, and seal after curing
Many bathroom remodels go wrong because of poor surface preparation or incorrect installation techniques. Over 60% of homeowners report increased satisfaction after upgrading their bathroom with new tile, but achieving professional results requires attention to detail at every stage—from substrate preparation to the final grout seal.
The process involves multiple phases: assessing and preparing your existing surfaces, selecting the right materials for moisture-prone areas, installing tiles with proper mortar coverage (at least 80% for interior jobs and 95% for wet environments), and finishing with quality grout and sealant. Each step builds on the previous one, which is why rushing or skipping preparation leads to cracked tiles, water damage, and costly repairs down the road.
I’m JR Smith, founder of H-Towne & Around Remodelers, and I’ve guided Houston-area homeowners through hundreds of successful bathroom tile installation projects over the past two decades. Whether you’re tackling a DIY weekend project or need expert help for a complex floor-to-ceiling design, this guide will walk you through every critical step to ensure lasting, professional results.
Phase 1: Planning, Design, and Preparation
Before we even think about mixing mortar, the success of your bathroom tile installation hinges on meticulous planning, thoughtful design choices, and thorough preparation. This foundational phase prevents headaches down the line and ensures your new bathroom looks fantastic and lasts for years.
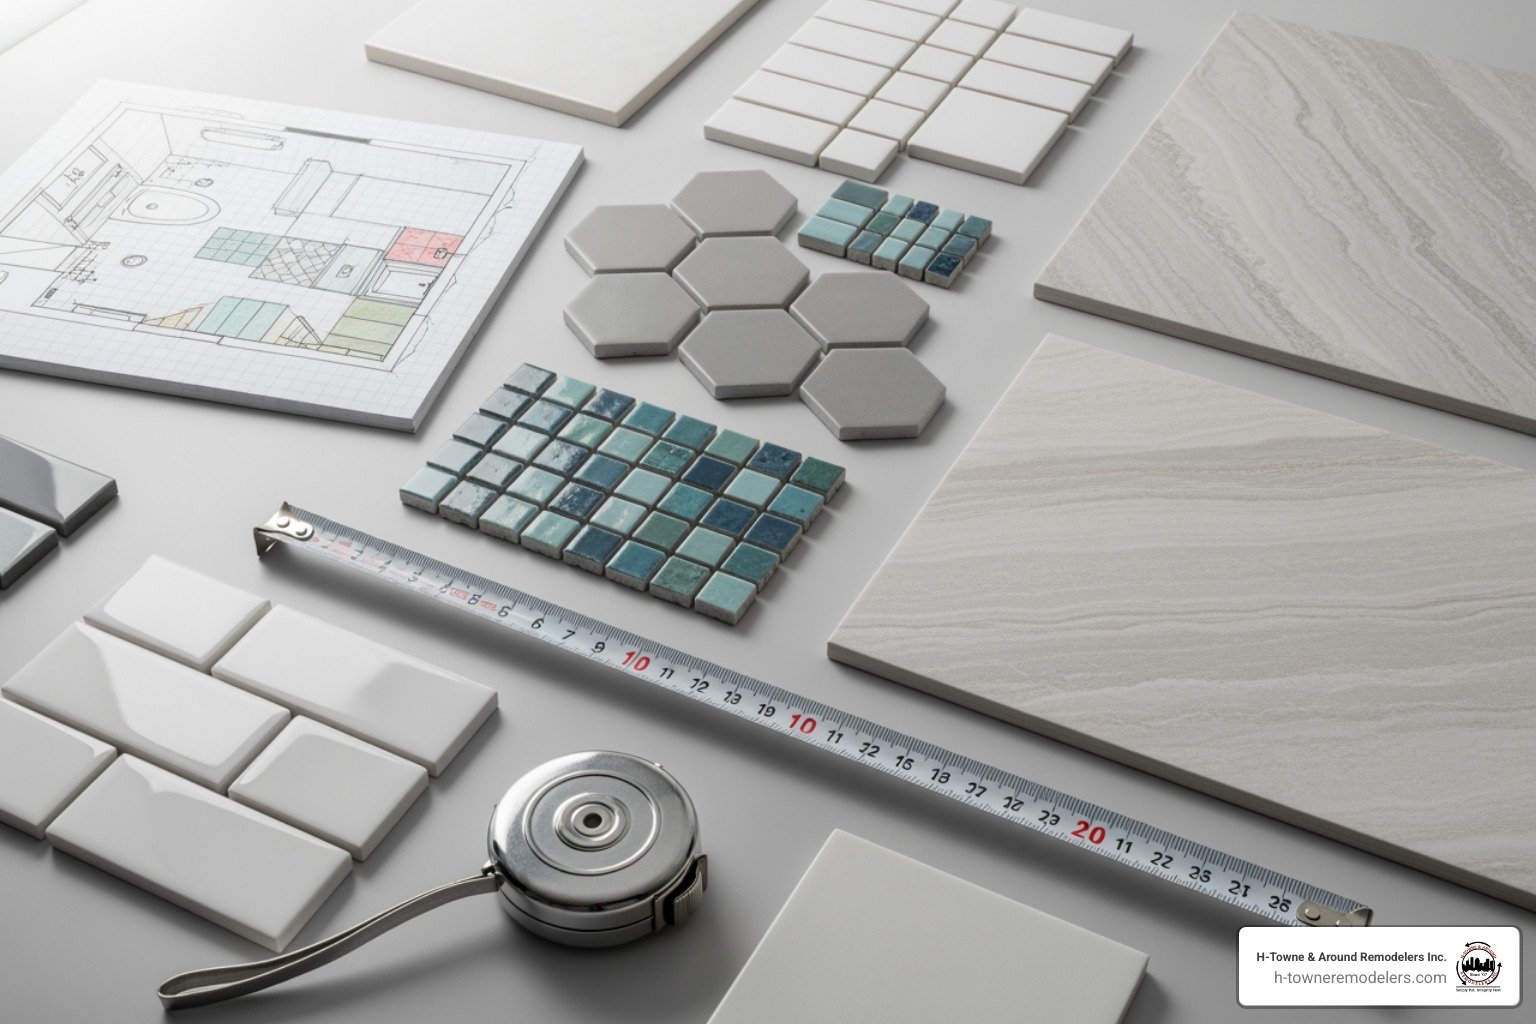
Choosing the right type of tile is crucial for a bathroom backsplash or wall, as it impacts both aesthetics and functionality. Ceramic and porcelain tiles are excellent choices, offering superior water resistance and a vast array of styles. Natural stone, while beautiful, requires more maintenance and sealing. Glass tiles can add a luxurious touch. When selecting materials, we always consider durability, moisture resistance, and aesthetic compatibility with your overall bathroom design. Over 60% of homeowners report increased satisfaction after upgrading their bathroom backsplash, so choose wisely!
One dramatic and attractive way to renovate is with floor-to-ceiling bathroom tiles. This design choice has been traditionally used in European and luxury homes to create a “wet room” feel. There are a lot of benefits to floor-to-ceiling bathroom tile. It makes your bathroom brighter and more airy by spreading natural light, and it provides exceptional protection for your drywall against moisture, allowing for larger, more integrated shower spaces.
For design considerations, floor-to-ceiling tiles can make a powerful statement. You might consider creating an accent wall with detailed, textured, or uniquely patterned tiles – a less expensive way to achieve a high-end look than tiling the entire room. When choosing your tiles, pay attention to color, style, and size. Busy patterns can be overwhelming if used everywhere, while large format tiles can actually make a space look bigger. Smaller tiles, like subway tiles, can be used to alter the visual perception of your shower walls when placed horizontally or vertically. It’s not always necessary for the tile to go all the way to the ceiling; the proportions of your room and ceiling height should guide your design to avoid making the space feel closed in.
Project scope and cost are also vital considerations. Bathroom remodels typically take 4-6 weeks, with smaller bathrooms finishing in 2-3 weeks and larger, more custom layouts stretching to 7-10 weeks. Cosmetic upgrades are the fastest, while full structural remodels take the longest. The average cost for a bathroom remodel generally ranges from £4,500-£12,500 (or approximately $5,500-$15,000 USD, though local prices in Houston may vary). When estimating materials, always account for obstacles like electrical outlets, windows, or other interruptions that might impact your tile layout. A good rule of thumb is to purchase 10-15% extra tiles to account for cuts, breakage, and potential future repairs.
Essential Tools and Materials for Bathroom Tile Installation
Having the right tools and materials is half the battle for a successful bathroom tile installation. Here’s what we recommend:
Essential Tools:
- Mixer/Corded Drill: We use a corded drill for mixing thinset and grout, though a powerful cordless drill can work for small batches.
- Spirit Level (Bubble Level) & Laser Level: Crucial for ensuring straight and level tile lines.
- Tape Measure: For precise measurements.
- Notched Trowel: The notch size depends on your tile size and thinset type. For example, a 1/4 inch x 1/4 inch square notch is common.
- Wet Tile Saw (with Diamond Blade) or Snap Tile Cutter: Essential for clean, precise cuts. A wet saw is best for harder or larger tiles, while a snap cutter works well for ceramic.
- Tile Spacers: For consistent grout lines.
- Small Chisel: Useful for cleaning out grout lines or prying up old tiles.
- Rubber Grout Float: For applying grout.
- Grout Sponge: For cleaning excess grout.
- Buckets: For mixing, water, and cleanup.
- Gloves, mask, safety glasses: Always prioritize safety!
Essential Materials:
- Tiles: Your chosen ceramic, porcelain, natural stone, or glass tiles.
- Thinset Mortar: Choose the right type for your tile and substrate (e.g., modified thinset for porcelain over cement board).
- Grout: Sanded or unsanded, depending on joint width.
- Cement Backer Board: Provides a stable, moisture-resistant substrate for walls and floors.
- Waterproofing Membrane: Liquid membranes like RedGard are painted onto cement board to create a moisture barrier.
- Alkali-resistant mesh tape: For reinforcing seams in cement backer board.
- Tile and Grout Sealer: To protect porous tiles and grout from moisture and stains.
Crucial Surface Preparation Steps
Preparation is perhaps the most critical phase of any bathroom tile installation. Neglecting it can lead to costly failures.
- Demolition and Assessment: Carefully remove old tiles, wallpaper, or any existing coverings. If tiling over existing tile, ensure it’s well-adhered and level. If there’s a loose tile, pry it out with a chisel; if not, you may have to break one to start. Assess the subfloor integrity for floors and wall studs for walls. Any flexibility or damage must be addressed. We always check for irregularities like curves, bumps, or uneven surfaces.
- Clean and Degrease: Thoroughly clean the entire surface to remove any dirt, grease, soap scum, or debris. A degreasing cleaner is essential, and the surface must be completely dry before proceeding.
- Ensure a Dry and Level Surface: Use a level to check wall flatness and sand down any significant bumps. Fill any depressions or uneven areas with a leveling compound for floors or thinset for smaller wall imperfections.
- Waterproofing: This step is non-negotiable in bathrooms, especially in shower areas. Install approved cement backer board on walls and floors. For joints in cement board, use a 2″ alkali-resistant mesh tape and trowel a layer of thinset over it. Overlapping seams with KERDI wrap and mortar is another excellent method for waterproofing. For wet areas like showers, we apply a liquid waterproofing membrane, such as RedGard, painted onto the cement board. This provides a crucial moisture barrier between the tiles and the backer board.
- Protect Surrounding Areas: Cover your tub, toilet, and flooring with drop cloths or plastic sheeting taped down securely to protect them from mortar and grout. Remove electrical outlet covers.
Phase 2: The Complete Bathroom Tile Installation Process
With your surfaces prepped and materials ready, it’s time for the exciting part: laying the tiles! This phase requires precision and patience, but the results are incredibly rewarding.
Layout Planning: Before applying any adhesive, planning your tile layout is paramount. For floors, find the center point of the room by snapping chalk lines between the midpoints of opposite walls. For walls, determine a starting point that will minimize small cuts in visible areas. Many pros start with a level ledger board screwed into the wall to support the first row of tiles, ensuring it’s perfectly straight. This is especially important when tiling walls, as gravity is not your friend!
Dry-fitting tiles is a critical step. Lay out a row of loose tiles along your center or starting lines, using spacers to account for grout lines. This helps you visualize the pattern, determine where cuts will fall, and adjust your layout to avoid awkward, sliver-thin cuts at the edges. Always account for obstacles like electrical outlets, windows, or other interruptions that might impact your tile layout.
While the basic process is similar, tiling a bathroom floor and a bathroom wall have key differences. Floors need a robust, level subfloor to prevent cracking, often requiring cement backer board over plywood. Walls, especially in showers, demand meticulous waterproofing. Gravity also plays a bigger role on walls, making a level ledger board crucial for supporting the initial rows.
Mixing and Applying Thinset Mortar
The correct method for mixing and applying thinset mortar is vital for optimal adhesion and preventing future tile failure.
- Mixing Technique: Always follow the manufacturer’s instructions on the thinset bag. Add liquid to the bucket first, then gradually add the powder, mixing with your drill and paddle attachment until it reaches a “peanut butter” or “dry cookie dough” consistency—smooth and lump-free.
- Slaking Process: After the initial mix, let the thinset “slake” for 5-10 minutes. This allows the polymers to fully hydrate. Then, remix it briefly. Never add more water after the initial mix, as this weakens the bond.
- Mixing Small Batches: As DIYers, we don’t work as fast as pros. Thinset has a limited “open time” (the time it remains workable before hardening). Our biggest tip is to mix small batches of mortar that you can use within 30 minutes. The DIY Tile Guy blog has an excellent mixing guide for small batches of thinset mortar.
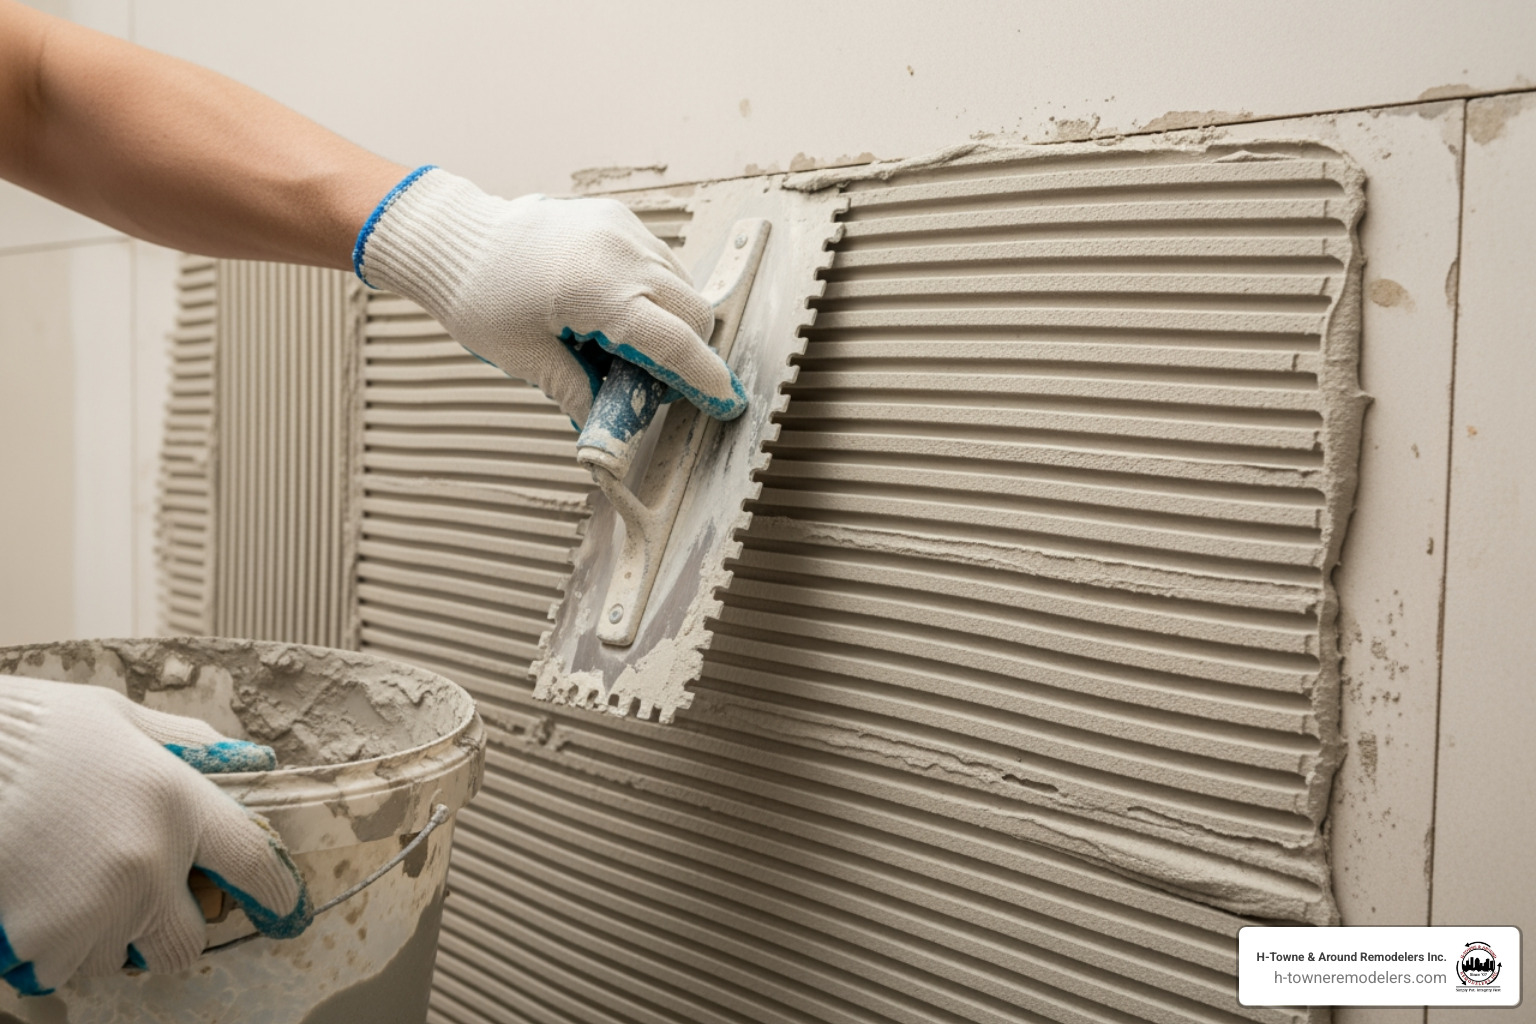
- Application: Spread a 1/4-inch coat of thinset onto the surface using the flat side of your notched trowel. Then, comb the adhesive with the notched side of the trowel held at a 45-degree angle. Always spread mortar in straight lines, not a swirl pattern, and all ridges should run in the same direction. This trowel technique video from Custom Building Products does an amazing job of showing why you want your mortar lines straight, in one direction.
- Back-Butter Each Tile: For optimal adhesion, especially with larger tiles or in wet areas, apply a thin layer of thinset to the back of each tile before setting it. This “back-buttering” ensures nearly 100% coverage. According to the Tile Council of North America (TCNA) Handbook, tile requires a minimum of 80% mortar coverage for interior jobs and 95% mortar coverage for exteriors, wet environments, and natural stone. Never assume you have the right mortar coverage when you’re tiling—occasionally pull up a tile to check.
Cutting and Setting Your Tiles for a Professional Bathroom Tile Installation
Cutting tiles to ensure a perfect fit around fixtures and edges is a skill that comes with practice.
- Cutting Techniques:
- Wet Tile Saw: For most precise cuts, especially on hard porcelain or natural stone, a wet tile saw is indispensable. It keeps the blade cool and minimizes dust.
- Snap Tile Cutter: For straight cuts on ceramic tiles, a manual snap cutter is faster and less messy.
- Around Fixtures and Edges: For complex shapes around toilet flanges, pipes, or electrical outlets, a wet saw with a diamond blade is usually best. You can use a contour gauge to trace irregular shapes onto the tile. Always cut tiles slightly larger and gradually trim them down rather than cutting too small initially. Place the factory edge of a cut tile next to another piece of tile, keeping the cut edge against the wall where it will be covered by trim or caulk. Leave a small gap next to the wall since tile moves.
- Setting Tiles: Begin setting your tiles in your planned layout, working in small sections. Press each tile firmly into the wet thinset with a slight twisting or wiggling motion to ensure full embedment and expel air bubbles. Use tile spacers consistently between each tile to maintain uniform grout lines. As you work, regularly check your tiles with a level to ensure they are plumb and level across the surface. Tap tiles gently with a rubber mallet and a wood block to ensure a good bond and level plane. Remove any excess thinset that squeezes up through the grout lines before it hardens.
Phase 3: Grouting, Sealing, and Vanity Installation
Once your tiles are set and the thinset has cured, the final steps transform your tiled surface into a finished, functional, and beautiful part of your bathroom.
Achieving a Perfect Grout Finish
The correct method for applying grout ensures proper coverage and a clean, durable finish.
- Preparation: Allow the thinset mortar to cure completely, typically 24-48 hours, before grouting. Remove all tile spacers and clean any excess mortar from the grout lines with a small chisel or utility knife.
- Mixing Grout: Mix your grout according to the manufacturer’s instructions. Achieve a consistency similar to thick mashed potatoes or dry cookie dough. Mix only enough that you can use within 30 minutes.
- Application: Using a rubber grout float, scoop a small amount of grout and spread it diagonally across the tile joints. Force the grout firmly into the joints, ensuring they are completely filled. Work in small sections, approximately 3×3 feet at a time.
- Removing Excess: Immediately after applying grout to a section, hold the float at a 45-degree angle and scrape off the excess grout from the tile surface, pulling it diagonally across the tiles.
- Cleaning: Wait 15-20 minutes for the grout to set slightly. Then, using a damp (not wet) grout sponge, gently wipe the tile surface in a circular motion to clean off the remaining grout residue and smooth the grout lines. Rinse your sponge frequently in clean water, changing the water often. On the first pass, wipe gently to avoid pulling grout from the joints.
- Grout Haze: After the grout has dried (usually 24 hours), a white “haze” may appear on the tiles. This can be removed with a clean, dry cloth or a specialized grout haze remover.
Sealing for Longevity and Moisture Protection
Sealing tiles and grout is essential to ensure longevity and protection against moisture, especially in a humid Houston bathroom.
- Curing Time: Allow the grout to cure for the manufacturer-recommended time, typically 48-72 hours, before applying sealer. This ensures the grout has fully hardened and dried.
- Sealer Application: For most ceramic, porcelain, and especially natural stone tiles, and for all grout lines, we recommend a high-quality penetrating sealer. These sealers absorb into the grout and tile, creating a protective barrier without altering the surface appearance. Apply the sealer evenly according to the product instructions, usually with a spray bottle or a small brush, to the grout lines.
- Wiping Excess: Immediately wipe away any excess sealer from the tile surface with a clean cloth to prevent a hazy film from forming.
- Protection: Allow the sealer to cure for at least 24 hours before exposing the area to water or heavy use. Regular cleaning with warm water and a pH-neutral cleaner, and reapplying sealer annually, will maintain protection against moisture and stains.
Installing the New Bathroom Vanity
Once your tile work is complete, installing the vanity adds the final functional and aesthetic touch.
- Positioning and Leveling: Carefully unbox and position your new vanity cabinet in its intended location. Use a level to ensure the cabinet is perfectly level and plumb. Use shims if necessary to achieve a level surface, especially on an uneven tiled floor.
- Marking Stud Locations: Locate the wall studs behind the vanity using a stud finder. Mark these locations on the wall and transfer them to the back of the vanity cabinet.
- Securing the Vanity: Once leveled and positioned, secure the vanity cabinet to the wall studs using appropriate screws. Drive screws through the vanity’s back cleat into the studs, ensuring a strong, stable attachment.
- Countertop and Sink Installation: Carefully place the countertop onto the vanity base. Apply a bead of silicone adhesive along the top edges of the vanity cabinet before setting the countertop to secure it. Install the sink into the countertop, following manufacturer instructions, and apply a silicone bead around the rim if it’s an undermount or drop-in sink.
- Connecting Plumbing: Connect the water supply lines (hot and cold) to the faucet and supply valves, ensuring all connections are hand-tightened and then given a quarter-turn with a wrench. Install the drain assembly, including the P-trap, and connect it to the wall drainpipe.
- Checking for Leaks: Turn on the water supply and thoroughly check all plumbing connections for any leaks. Tighten connections as needed.
Common Mistakes and When to Call a Pro
Even seasoned DIYers can make mistakes, but knowing what to avoid can save you time, money, and frustration during your bathroom tile installation.
Common Mistakes to Avoid:
- Poor Surface Preparation: Skipping cleaning, leveling, or waterproofing leads to tiles failing, cracking, or developing mold. This is arguably the biggest mistake.
- Incorrect Layout Planning: Not dry-fitting or failing to account for awkward cuts results in an unprofessional finish. Always account for obstacles like electrical outlets, windows, or other interruptions that might impact your tile layout.
- Bad Mortar Mixing or Application: Thinset that’s too wet, too dry, or applied unevenly (without proper coverage) causes tiles to pop off or crack. Remember the TCNA Handbook recommends 80% coverage for interior, 95% for wet areas.
- Uneven Grout Lines: Rushing or inconsistent use of spacers leads to an amateurish look.
- Skipping Waterproofing: This is a recipe for disaster in bathrooms, leading to water damage and mold behind the walls.
When to Call a Pro:
While a DIY bathroom tile installation can be incredibly rewarding, there are times when hiring a professional is the smartest choice. Many people will find that it’s easier to hire a professional than try to struggle through a complete tile installation themselves.
Consider calling in H-Towne & Around Remodelers if:
- Complex Layouts or Tile Patterns: Intricate designs like herringbone, mosaics, or large-format tiles require a higher level of skill and specialized tools.
- Structural Issues: If your subfloor is uneven, flexing, or if walls aren’t plumb, addressing these underlying issues correctly is paramount and often requires professional expertise.
- Lack of Time or Tools: A quality tile job takes time and the right equipment. If you’re short on either, a professional can complete the job efficiently and with superior results.
- Wet Room or Shower Pan Installation: These areas require specialized waterproofing techniques and precise slopes for drainage, which are best handled by experienced tradesmen.
- Desire for Flawless Results: Our highly experienced, multi-generational, licensed, and insured tradesmen ensure exceptional quality and customer satisfaction, guaranteeing a finish that DIY might struggle to achieve.
Frequently Asked Questions about Bathroom Tile Installation
How long does a bathroom tile installation take?
A typical bathroom tile installation project’s duration varies based on the scope and complexity. Generally:
- Preparation: 1-3 days (demolition, surface leveling, waterproofing).
- Tiling: 2-5 days (depending on room size and tile type).
- Grouting and Sealing: 2-3 days (including curing times).
Overall, a full bathroom remodel, including tile, vanity, and other fixtures, can take 4-6 weeks on average. Smaller bathrooms tend to wrap up in about 2-3 weeks, while larger rooms with more fixtures or custom layouts often stretch to 7-10 weeks.
Can I tile over existing bathroom tiles?
Yes, you can tile over existing bathroom tiles, but only under specific conditions. The existing tiles must be:
- Level and Structurally Sound: The surface must be perfectly flat, and the existing tiles must be securely adhered to the substrate with no loose or cracked pieces.
- Clean and Prepared: The surface needs to be thoroughly cleaned, degreased, and often scuffed or sanded to provide a profile for the new adhesive to bond to. A specialized primer may also be required to ensure proper adhesion.
If the existing tile is uneven, loose, or damaged, it’s always best to remove it first. Laying new tile over a compromised surface will only lead to failure of the new installation.
What is the difference between sanded and unsanded grout?
The primary difference between sanded and unsanded grout lies in their composition and intended use:
- Sanded Grout: Contains fine sand particles, making it stronger and more resistant to shrinking and cracking. It’s ideal for wider grout joints, typically 1/8 inch or more, and is commonly used for floor tiles due to its durability.
- Unsanded Grout: Does not contain sand, resulting in a smoother consistency. It’s best for narrow grout joints, usually less than 1/8 inch, and is preferred for polished tiles, glass tiles, or highly delicate surfaces where sand could cause scratching.
Your Dream Bathroom Awaits
We’ve covered the crucial steps, from meticulous planning and preparation to precise tiling, grouting, and the final touches of vanity installation. While the satisfaction of a DIY bathroom tile installation is immense, achieving a truly professional, long-lasting finish often benefits from expert hands.
At H-Towne & Around Remodelers Inc., we pride ourselves on providing Houston homeowners and those in surrounding areas like Cypress, Katy, Tomball, and The Woodlands, with flawless, expert results. Our highly experienced, multi-generational, licensed, and insured tradesmen ensure exceptional quality and customer satisfaction, changing your vision into a stunning reality. Ready to transform your home with a team you can trust? Explore our house renovation services and find why we’re the premier choice for home remodeling in our locations.